HEADLINES
Building a skin on frame canoe Posted: July 9, 2023
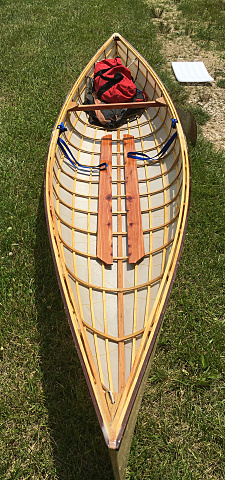 This is a photo essay about building a skin on frame canoe. The 12 foot boat weighs less than 15 lbs. All the wood I used I felled, milled, seasoned and machined. The ribs are a steamed and bent White Oak, the stringers, gunwale and inwale are Red Pine, the keel is White Oak, the bumper rail is Black Walnut, the backrest/thwart is a laminate made of Red Cedar and White Oak and all the plywood I made from Red Pine, White Oak and Black Walnut. A kit from Gaboats.com offered the design, glue, kevlar yarn, heat bonding tape and Dacron skin. All the wooden parts and kevlar were spar varnished after assembly and the skin was sealed with "Cory's Goop" with a bit of mineral pigment. The boat runs true in the water and handles well. The design is a mix of monocoque, tensegrity and classic Inuit skin on frame methods that makes for a surprisingly resilient and lightweight boat. Click
here for the photos
Making a Real Estate Survey for the Non-professional Posted: January 21, 2023
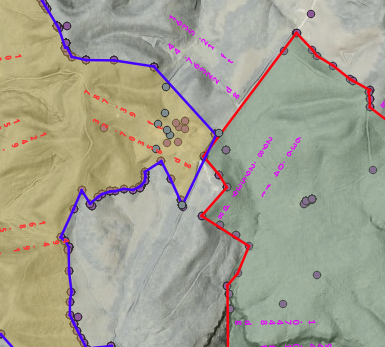 Making a Real Estate Survey for the Non-professional. Making a Real Estate Survey for the Non-professional.
Installing the Maslow CNC WebControl software on a Rock64 Posted: August 15, 2021
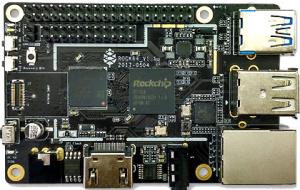 How to Install the Maslow CNC WebControl software on a Rock64 single board computer. How to Install the Maslow CNC WebControl software on a Rock64 single board computer.
How to Build an Affordable RTK GPS Base/Rover Survey Tool Posted: June 11, 2021
How to Build an RTK Base/Rover GPS survey system, accurate to less than 4 cm for about $1100 (20210611). 
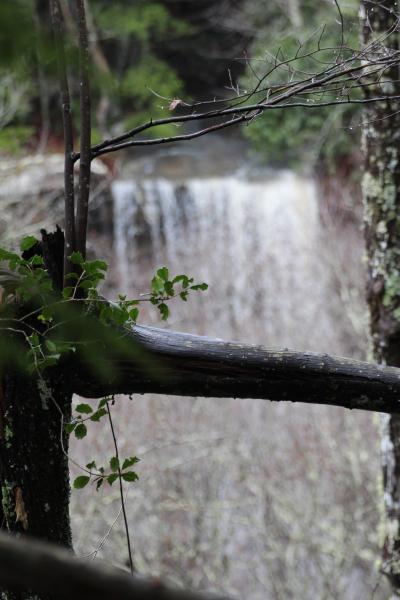
Waterfalls, efts, and more. Posted: June 11, 2021
Click Here to see waterfalls, efts, ladyslippers, and a woodpecker. 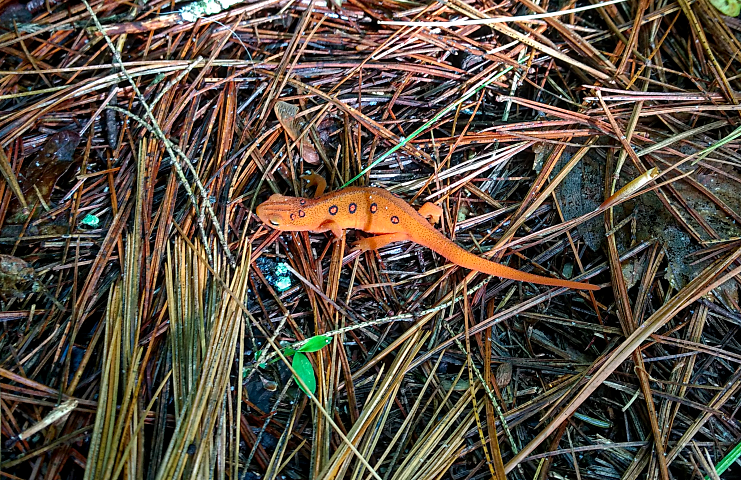
Old and New photos Posted: June 11, 2021
Click Here to browse some 1968 photos and some 2021 photos. 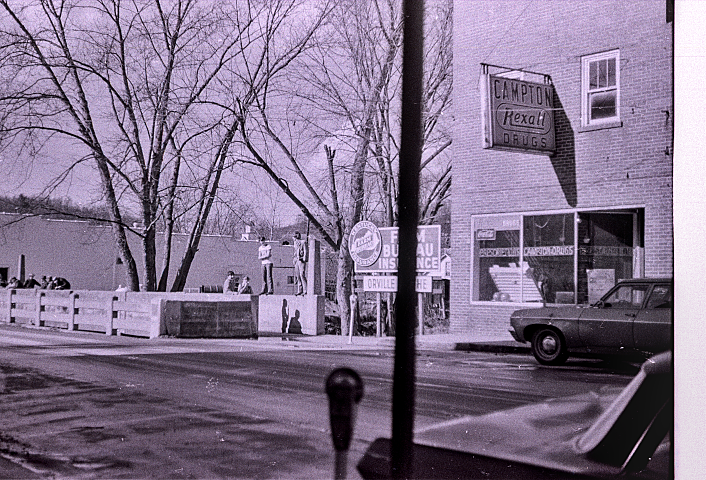
An Old Photo Shoot at Alfalfa Posted: March 12, 2020
Click Here to see 25+ year old photos from a restaurant's anniversary photo shoot. 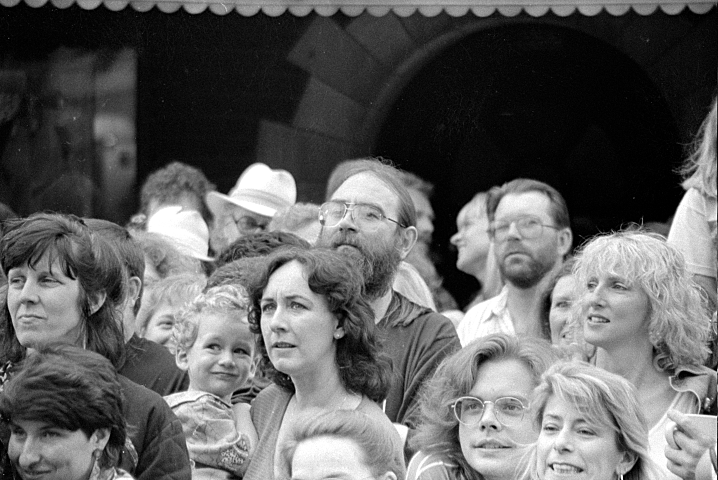
Pretty Things Au Natural Posted: April 12, 2019
Click Here for A Small Gallery of Pretty Things Au Natural . 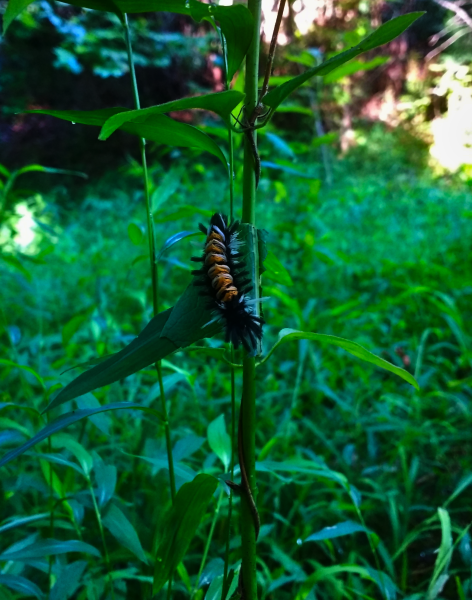
Naturals Posted: April 11, 2019
Click Here for A Small Gallery of Natural Beauties .

More Critturs Posted: April 11, 2019
Click Here for A Gallery (mostly) of Critturs . 
Rock Stories Posted: April 11, 2019
Click Here for A Gallery of Rocks .
Fun Guys Posted: April 11, 2019
Click Here for Yet Another Gallery of Mushrooms. 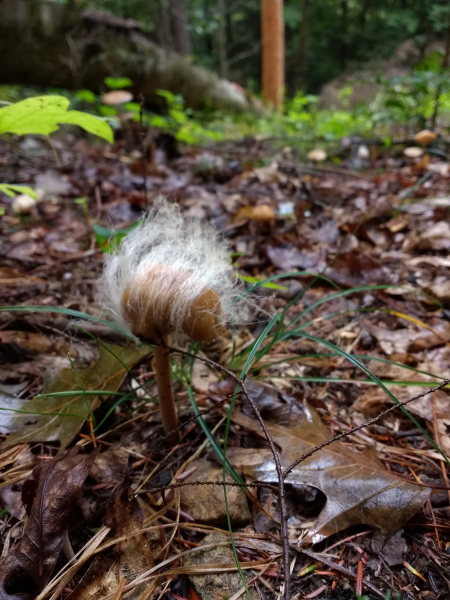
Why Kentucky Legislators should not repeal current waste disposal requirements for nuclear power plants in the Commonwealth, 2017. Posted: January 31, 2017
Unlike any other bill offered in this session, the term of consequence and the scale of liability entailed by the House and Senates simple revision of nuclear waste management statutes are measured, at least, in centuries and may encumber unhealthy fractions of the states economy. The current bills lack measures of cost and benefit, limits to the scale and style of nuclear fission thermal power plants, guidance about risk management and mitigation, or any commitment to ever remove Spent Nuclear Fuel (SNF) from the Nuclear Power Plant (NPP) site. It may unnecessarily predispose the state to reprocess waste without consideration of cheaper disposal methods or the lack of market for reprocessed NPP fuels (MOX, Mixed Oxides fuel). These issues deserve more consideration than a rubber stamp, and will certainly be reviewed in future legislative sessions. Please make choices that the next generation can abide.
Click here for the full PDF (13p).
Shorewall-lite v5 on Openwrt Routers (2015+) Posted: May 3, 2016
Installing Shorewall-lite on OpenWRT 20160503
This document details installing Shorewall-lite (https://shorewall.net/Shorewall-Lite.html) on recent (2015+) OpenWRT (https://wiki.openwrt.org/) routers. While this procedure is unlike the standard OpenWRT opkg method, the Shorewall-lite installation is very lightweight and easy. However, the task may be made difficult by the limited resources on a given router. Shorewall-lite can run on an OpenWRT router using the stripped IP tool that is the default, but using opkg to install the ip-full and tc modules on the router offers a more proven Linux solution.
Once installed, instructions for using Shorewall-lite & Shorewall can be found here (https://shorewall.net/Shorewall-Lite.html, https://www.shorewall.org/Shorewall-5.html, & https://shorewall.net/Documentation_Index.html), and here (https://wiki.openwrt.org/doc/recipes/shorewall-on-openwrt).
Choosing the right router and firmware
Routers that have more than 4 MB flash or have USB ports are relatively facile, as there is enough space to directly install Shorewall-lite locally, or on a USB boot drive (https://wiki.openwrt.org/doc/howto/extroot), and one can use a stock release of the OpenWRT firmware and tools for the task.
If your router is one of the constrained devices, you can opt for the easy way, using a pre-built daily snapshot trunk image (https://downloads.openwrt.org/snapshots/trunk/), or if you need to compile kernel modules or packages, you can build your own firmware as described in Using the OpenWRT Build System below (the hard way). Both methods offer a small footprint firmware without Luci/web setup support and youll need to configure the router from configuration files, not the web interface, or use the two step method discussed below. Unless you need to use the build system, ignore the topic and details in that section below, it is much less work to use the OpenWRT snapshot trunk firmware with opkg installed ip-full and tc modules. However, users that cannot manage with the stock OpenWRT firmwares will want to first skip the next section and instead go straight to the Using the OpenWRT build system step. NB: the first run through the OpenWRT build takes hours, overnight is a good time to make the first run.
Proceed to the next step once you are ready to install an OpenWRT firmware on your router using the one or two step methods, discussed below. Also have the administrative system ready to install Shorewall.
Install Shorewall to Administrative System
* On the Administrative (build) system, fetch the latest or preferred release from https://www.shorewall.net/download.htm, that includes: shorewall, shorewall-core, and shorewall-lite packages (docs too, if you like from https://www.shorewall.net/pub/shorewall ). This example puts those files in /usr/src, use another directory freely.
* Install Shorewall on the administrative system as usual (first shorewall-core, then shorewall).
* Remove the /etc/default &| /etc/init.d shorewall files from the administrative system, this Shorewall is building for another system.
* Debian users should fetch the base files from /usr/share/shorewall/configfiles/* to your working directory, other distributions should find those files in /etc/shorewall. Copy them to a working directory, e.g.: /usr/src/shoWRT. Edit the working Shorewall files to set up Shorewall and make Shorewall-lite for the router.
Install a Firmware to the Router
Two-Step with Luci/web setup.
If you want to provide your own router configuration files, skip this section and go to the One Step section below, otherwise:
Install a release Openwrt Luci-ready image for your device (https://wiki.openwrt.org/toh/start) from their server (https://downloads.openwrt.org/) or from a Luci-ready release-like firmware youve built (see below). Use that release to configure the router. If you have enough free space, or set up the extroot USB boot drive, you can now install ip-full and tc, and skip directly to the Install Shorewall-lite on the Router section, below.
By using a two step installation on a constrained router, you will later be able to manage the config files from the CLI, but will first use Luci and the standard Openwrt setups to make the initial configuration files. Use the System/Backup to make and export the configuration. Keep that as a reference, but DO NOT RESTORE THAT FILE with sysupgrade. All efforts to use sysupgrade -r break the router and require a failsafe/firstboot/sysupgrade repair.
Proceed to the next step to reflash the device with the production firmware once the router has a basic configuration ready for Shorewall-lite.
One Step/Last Step without Luci/web.
If you have a resource constrained router, install the image youve built, that has room for or already includes ip-full, tc, and for shorewall-lite. If your router already had OpenWRT on it, from the Two Step method or some prior install, use the sysupgrade image. That image will inherit your configuration, otherwise, assert your own /etc/config, & /etc/ files to set up the interface names and networks.
To sysupgrade, use scp to copy your built firmware (for example, openwrt-ar71xx-generic-dir-601-b1-squashfs-sysupgrade.bin) from the openwrt/bin/ar71xx/ directory to /tmp on the router, and there use: "sysupgrade openwrt-ar71xx-generic-dir-601-b1-squashfs-sysupgrade.bin to install the firmware.
See the OpenWRT installation instructions for your router if this is a first time installation and the router has not had OpenWRT on it before (https://wiki.openwrt.org/toh/start).
If you included modules in your build, and you want to use opkg to install them on the router, edit the routers /etc/opkg.conf file to prefix a line like: "src/gz snapshots https://192.168.1.100/openwrt/ar71xx/packages" ( replace the example URL link with your own web server hosting the firmware files), that adds the new opkg repository to the router. Next, edit the /etc/opkg/distfeeds.conf and swap your source url into the text, and last, run opkg update. You can now use opkg to install the modules as usual. For example,
opkg update; opkg install ip-full; opkg install tc
You should now have an Openwrt device with ip-full, & tc. You are now ready to install Shorewall-lite on the router.
Install Shorewall-lite on the Router
* From the Administrative machine, copy the expanded Shorewall-core files from the release tarball in /usr/src to /tmp/shorewall-core on the router. Copy the shorewallrc.openwrt file to/tmp/shorewall.core/shorewallrc and if storage space is limited , only install.sh, lib.base, lib.cli, lib.common, shorewallrc, & wait4up.
* Log in (ssh) to the router and install the core files.
cd /tmp/shorewall-core; chmod +x install.sh; ./install.sh
cd /tmp; rm -R /tmp/shorewall-core
* From the Administrative machine, copy the expanded shorewall-lite files from the release tarball to /tmp/shorewall-lite on the router.
* Log in to the router.
cd /tmp/shorewall-lite; rm ./manpages/*; chmod +x install.sh; ./install.sh
cd /tmp; rm -R /tmp/shorewall-lite
You should see something like:
Installing OpenWRT-specific configuration...
Installing Shorewall Lite Version 5.0.8-RC2
...
Shorewall Lite Version 5.0.8-RC2 Installed
* Run shorecap on the router:
cd /tmp; /usr/share/shorewall-lite/shorecap > capabilities
Copy the capabilities file to your working directory on the administrative system.
* List the ifconfig results & ip routes to prepare the shorewall configuration for the router, e.g.:
eth0: 192.168.1.1/24 brd 192.168.1.255
eth1: 192.168.2.150/24 brd 192.168.2.255
wlan0: 192.168.3.1/24 brd 192.168.3.255
wlan0-1: 192.168.4.1/24 brd 192.168.4.255
* Construct the firewall for your router on the administrative system according to standard Shorewall procedures and instructions in your local configuration directory. See https://shorewall.net/Documentation_Index.html for detailed instructions. When ready, use:
shorewall remote-reload
to load the new firewall to Shorewall-lite on the router. Once complete, the Shorewall-lite firewall is loaded and started on the router.
*This completes the Shorewall-lite installation. The next section is only for those needing to build a custom OpenWRT firmware.
Using the OpenWRT build system
The standard OpenWRT releases will work for many users, if you are one of them, skip this section, it is not germane.
Those wanting to install Shorewall-lite on a resource constrained router, or to get both a full ip and tc setup with their Shorewall-lite, may need more free space than is immediately available. Such users may own routers with USB ports, and those are readily setup to pivot the root to a USB drive at boot (extroot, see the link in the first paragraph, above). Booting from a USB drive eliminates space restrictions that might limit adding tools to the OpenWRT router.
For those without USB ports who need to run the router with constrained file space, the OpenWRT build system (https://wiki.openwrt.org/doc/howto/build) provides the requisite advantages critical to such users: more free space for routines, and the inclusion of modules and tools in the firmware. The first build takes a long time, however.
In some cases, especially with unfamiliar hardware, the most efficacious setup uses both methods, with two firmware passes: the first skips the Shorewall-lite setup and uses a regular OpenWRT releases Luci/web to configure the router from your browser. Use the web interface to first construct the interface names and networks, and then to backup those settings. Your settings will be inherited by the second pass firmware, installed by a sysupgrade. The second pass production firmware offers the free space to install ip-full, tc, and Shorewall-lite, but without Luci/web management.
Users familiar with OpenWRT configuration files can likely one step the task, skip the web based first pass firmware, and copy or compose the requisite router configuration files without Luci/web management.
To do the two steps most easily, use the OpenWRT download site (https://downloads.openwrt.org/) and first flash with the generic firmware for your target router (https://wiki.openwrt.org/toh/start). Configure the router using Luci: set the interfaces, wifi, & device name. Note the precise names, and backup the installation for reference (NB: sysupgrade restore fails dangerously, dont try to use the backup with sysupgrade).
Next, reflash the router using a sysupgrade with the small footprint firmware you built (see below). If not already in the firmware, use opkg to install the tc and ip-full modules. Lastly, use the /tmp router installation method described above to install shorewall-core and shorewall-lite.
* In this example the working directory /usr/src/openwrt is on the administrative box. The instructions below are Debian-centric, substitute your distributions package manager for apt-get. For more information about building OpenWRT, see:
Table of known prerequisites and their corresponding packages @
https://wiki.openwrt.org/doc/howto/buildroot.exigence
As root
* apt-get update
* apt-get install git-core build-essential libssl-dev libncurses5-dev unzip gawk gettext subversion mercurial
* Create /usr/src/openwrt, set the owner to your userid, not root, set the file privilege to +write.
As NOT root
* cd /usr/src
* To get the latest trunk snapshot:
git clone git://git.openwrt.org/openwrt.git
* To get a regular release visit git.openwrt.org, and select its project, and from that project page, find the git URL, and invoke it, e.g.:
git clone git://git.openwrt.org/15.05/openwrt.git
* cd /usr/src/openwrt; ./scripts/feeds update -a; ./scripts/feeds install -a
Choose what to build
To Make a Slimmer Production Firmware for ip-full, tc, and Shorewall-lite
* You can run make menuconfig and remove unneeded features to save space, or you can make your own .config file, modeled on the ones below. These examples all presume you are in the working openwrt directory, /usr/src/openwrt. Most users will use the next option, to use make menuconfig from the working directory to make their slim, Shorewall-lite ready firmware.
If you use make menuconfig
* Make a copy of your current.config file if you wish to keep it, the next instruction will erase that file. Run:
rm .config; make menuconfig;./scripts/diffconfig.sh > config.tmp;cp config.tmp .config;cat .config
Make your explicit changes in makemenu, then save and exit the routine, your .config will be displayed.
For example, to include tc and ip-full in the firmware, from makemenu first select your target device, then navigate to network/routing and redirection/ and mark the two entries ip-full & tc with * (use spacebar to mark), then save and exit.
For another example, to tether Atheros wifi radios to the users regdomain table and set CONFIG_ATH_USER_REGD=y, from makemenu/kernel modules/wireless drivers/kmod-ath, choose "Force Atheros drivers to respect the user's regdomain settings." Save and exit makemenu.
The .config from the above will show the differences you've made to default:
CONFIG_TARGET_ar71xx=y
CONFIG_TARGET_ar71xx_generic=y
CONFIG_TARGET_ar71xx_generic_DIR601A1=y
CONFIG_ATH_USER_REGD=y
CONFIG_PACKAGE_ip-full=y
CONFIG_PACKAGE_kmod-sched-core=y
CONFIG_PACKAGE_tc=y
Add these lines to your .config:
CONFIG_COLLECT_KERNEL_DEBUG=y
CONFIG_IB=y
CONFIG_IB_STANDALONE=y
CONFIG_IMAGEOPT=y
CONFIG_PACKAGE_libiwinfo-lua=y
CONFIG_PACKAGE_liblua=y
CONFIG_PACKAGE_libubus-lua=y
CONFIG_PACKAGE_libuci-lua=y
CONFIG_PACKAGE_lua=y
Use the two stanzas above to make a .config file in the openwrt directory (line order doesnt matter). It will make a production firmware that has tc and ip-full already included, and room for Shorewall-lite. To make the firmware from this .config, run:
make defconfig; make -j 1 V=s
Your production image in the default bin/$TARGET directory.
To Make a Firmware Like a release
* To make the same setup as a release but with slight differences, git the release (as above), then copy and edit the targets config.diff. The config.diff file can be found in the OpenWRT release targets description, e.g.:
https://downloads.openwrt.org/chaos_calmer/15.05.1/ar71xx/generic/config.diff
In this example, Atheros wifi radios are tethered to the users regdomain table, but otherwise the same packages and settings used in the standard release are included . First copy the release targets config.diff to the openwrt directory, backup your current .config file, then to use make menuconfig to select your device and options, run:
rm .config; make menuconfig;./scripts/diffconfig.sh > config.tmp;cp config.tmp .config;cat .config
The menuconfig takes a moment to come up. Choose your target profile (select your device from the list), save and exit, then run
echo CONFIG_ATH_USER_REGD=y >> config.diff; cp config.diff .config;
* Fixup the CONFIG_TARGET in the config.diff file with the values in .config e.g.:CONFIG_TARGET_ar71xx_generic_DIR601B1=y. Unless you want to build for all targets (true for published releases, not true for our purposes), delete the CONFIG_SDK & the CONFIG_VERSION and related broad reach lines from the release's default to make a config.diff that looks something like the below (ymmv).
* Example release-like .config.diff:
CONFIG_TARGET_ar71xx=y
CONFIG_TARGET_ar71xx_generic=y
CONFIG_TARGET_ar71xx_generic_DIR601B1=y
CONFIG_ATH_USER_REGD=y
CONFIG_COLLECT_KERNEL_DEBUG=y
CONFIG_IB=y
CONFIG_IB_STANDALONE=y
CONFIG_IMAGEOPT=y
CONFIG_PACKAGE_libiwinfo-lua=y
CONFIG_PACKAGE_liblua=y
CONFIG_PACKAGE_libubus-lua=y
CONFIG_PACKAGE_libuci-lua=y
CONFIG_PACKAGE_lua=y
CONFIG_PACKAGE_luci=y
CONFIG_PACKAGE_luci-app-firewall=y
CONFIG_PACKAGE_luci-base=y
CONFIG_PACKAGE_luci-lib-ip=y
CONFIG_PACKAGE_luci-lib-jsonc=y
CONFIG_PACKAGE_luci-lib-nixio=y
CONFIG_PACKAGE_luci-mod-admin-full=y
CONFIG_PACKAGE_luci-proto-ipv6=y
CONFIG_PACKAGE_luci-proto-ppp=y
CONFIG_PACKAGE_luci-theme-bootstrap=y
CONFIG_PACKAGE_rpcd=y
CONFIG_PACKAGE_uhttpd=y
CONFIG_PACKAGE_uhttpd-mod-ubus=y
# CONFIG_PER_FEED_REPO_ADD_COMMENTED is not set
* When the config.diff file is ready, run
cp config.diff .config; make defconfig; make -j 1 V=s
to build the release-like firmware for your target device, a DIR601B in the above example.
If you make your own .config file
* Backup your current .config, then run:
rm .config; make menuconfig;./scripts/diffconfig.sh > config.tmp;cp config.tmp .config
and while in menuconfig, only select your target profile (device), save and exit. The .config will contain only the TARGET lines.
* Write or copy a sane config.diff to .config in the openwrt directory, then:
make defconfig; make -j 1 V=s
* A sane file looks something like:
CONFIG_TARGET_ar71xx=y
CONFIG_TARGET_ar71xx_generic=y
CONFIG_TARGET_ar71xx_generic_DIR601B1=y
CONFIG_ATH_USER_REGD=y
CONFIG_COLLECT_KERNEL_DEBUG=y
CONFIG_IB=y
CONFIG_IB_STANDALONE=y
CONFIG_IMAGEOPT=y
Where the CONFIG_TARGET and CONFIG_ATH lines are specific to the make and model of your router. Additional PACKAGE lines will add programs to the build.
* Some .configs can trash the build system and known working configurations will fail. In that instance:
make clean
The next build will reconstruct all the dependencies, that may repair the problem. It will take longer than a typical second pass build.
In All Cases
* The above willl take a long time on the first pass. Subsequent passes will take less time. Some multi-core CPUs work to speed compilation, but others bomb. If you want to try, substitute the (number of CPU cores + 1) for the 1 in the make above. If this produces random build errors, revert to the 1, as above.
*Check that the firmware was built, sometimes make fails only on select versions, e.g.: "error: images are too big by 1001214 bytes". Usually, leaving tools as modules allows for more free space.
* Once the build is complete, copy the /usr/src/openwrt/bin dir from the Administrative box to a working http, to make the new build available to the router via URL.
* The Atheros examples above need to use iw to setup the wifi radio, e.g.:
iw dev wlan0 set txpower fixed 16mBm
John Deere 350 Steering Clutch Installation Posted: October 7, 2014
This is the follow on to the "How To Pull The Steering Clutch" How To. There are pictures here. * Broad advice: don't over lube the internal components. Always clean around the cover plates before removing them. * Check the brake drum for roundness, have it milled as needed. * Acquire all the replacement parts, e.g.: pilot bearing, throwout bearing, clutch plates (fiber & steel as needed), pressure plate, and brake band (oversized if you've milled the brake drum). Also have on bearing grease, hand sealants, brake parts cleaner, steel wool & paper towels. * Pack the pilot bearing with grease and install it. Clean everything very well when done. * Thoroughly clean the interior of the steering clutch assembly, both the section still on the bulldozer and on the final drive. Use steel wool and brake cleaner to prep the machined flat faces for sealing. Clean all residues from the brake drum and steel clutch plates. * Reassemble the steering clutch into the brake drum. First place a fiber clutch plate against the interior back wall of the brake drum, then a steel plate. Insert the interior drive hub with retaining clip. The drive hub's retaining clip lies in the same plane as the first steel clutch plate already in place. Insert the remaining fiber & steel plates. NB: If you try to mount all the plates onto the hub on the outside of the retaining clip (as described in some manuals), you will fail and have to dismount and dissasemble the final drive, and likely have to replace at least one fiber plate. I had a John Deere dealer mis-repair a couple of JD350 final drives, so I know it is a mistake one can make. * Insert the drive shaft. * Bolt on the pressure plate (torque to 20 ft/lbs). Be sure you can freely install and remove the drive shaft (loosen the pressure plate and re-align/re-tighten as needed). Actuate (or rap on) the pressure plate a few times to assure the plates are all snug and tight during the adjustment. Acquire or fabricate the plate guage (see photos), and adjust the three pressure plate fingers to the correct uniform height. You can tweak the standard height up a bit if you want to shorten the steering lever throw and take up some threads on your lever-to-throwout adjuster (if this sentence doesn't make sense, just ignore it and use the factory settings). * Using the absolute minimum of grease, lube the bearing carrier shaft. Install the new throwout bearing onto the carrier and restore the return spring to lie in front of its upper retaining bolt. Lube the other internal components in the same fashion: minimally and with terrific care to not contaminate the brake or clutch, now or in the future. * Install the brake shoe. * You are ready to re-install the final drive. * Ready a clean support rope for the brake drum. Remove the drive shaft and position the final drive proximate to its mounted position on the bulldozer. Install the drive shaft inside the bearing carrier tube with the pilot bearing end out. Install the 18" long 1/2" threaded rods and their support. Turn the final drive/brake drum until the drive shaft is aligned at both ends and will allow the final drive to slide to the bulldozer. Do not contaminate the brake drum during this alignment. * Clean the brake drum one last time. Apply sealant to the machined face of the bulldozer where it meets the final drive. Put in a couple of bolts and pull the final drive into position. Install the Cross Bar mounting bolts. The John Deere manual notes the fact that special "barrel" bolts should be lubed with "Lubriplate" (tm) and torqued to 300 ft/lbs. The other two are torqued to 250 ft/lbs. All four of these bolts can be accessed from the side of the machine. Once they are installed, bolt up the rest of the final drive. The larger (upper) bolts torque to 175 ft/lbs, and the smaller (1/2") bolts torque to 85 ft/lbs. * Adjust the steering clutches in the normal fashion. * Restore the remaining components (track, side cylinder, fuel tank, etc). Adjust the track tension as usual. * If you drained the final drive, replace the lubrication: c. 3 qts hydraulic fluid. * Make a final inspection of the machine. * Fire it up and test your new steering clutch. It should be in good working order. Once satisfied, it is a good practice to seal the steering clutch top plates: it is work to open the clutches for adjustment, but the risk of contamination is nearly eliminated by sealing them.
How to Pull the Steering Clutch from a John Deere 350 Bulldozer, with photos. Posted: August 28, 2014
This is a one man job with the right tools. Click to see photos of a JD350 Steering Clutch R&R * Pull rear floor panel and seat bottom. Pressure wash dozer's back, belly pan bolts, & side(s) & top, under the seat. * Position bulldozer on shop floor for good access to the final drive by hoists/cranes/backhoe. * Jack up the side of the bulldozer under repair until the track is clear of the floor. Hold back the off side steering clutch lever so that track does not spin, and turn the repair side track to orient the removable track retaining link pin. A hammer clears best when the pin is about centered, about one half way up the rear sprocket. * Release or unscrew the Zirk fitting on the repair side track cylinder, to slacken the track. Use a block and the blade to compress the track cylinder if need be. * Raise the 3 point hitch lift arms to highest position. * Shut down motor. Drain the fuel tank and final drive: you can carry on while they drain. * Remove the 3-point hitch lift arm chain limiters from the quadrant (the curved rail under the drawbar). Remove the 3-point hitch lift arms. * Remove 9/16" retaining bolt from repair side lift cylinder front pin, and pull pin. * Drive spring retaining pin from repair side lift cylinder rear pin, and pull pin. * Pull top repair side bolt from rockshaft support at the rear of the dozer. * String a hand winch and draw up the repair side track. Remove the track retaining link pin. Slowly release the winch to relax the track. Use a cheater or board to conduct the track off the final drive and away from the repair work area. * Remove the belly pan to final drive bolts, front (with biq square washer), and rear. * Use a hand winch to lift out the repair side cylinder support: use a cheater to pull the two large bolts on the front of the repair side 3-pt hitch lift cylinder support, above and in front of the rear cross shaft. While working the lift cylinder up and forward, winch the support up and turn it outward to free it from the chassis, while leaving the lift cylinder attached. Tie off the lift cylinder away from the repair site. * Remove the 8 bolts holding the repair side drive sprocket. Pull sprocket. * Remove seat. Remove fuel tank. The final drive is now ready to unbolt.
* Once the final drive is exposed, and all the surrounding hardware has been removed, the drive itself can be unbolted. There are a couple of hard to reach bolts that are torqued enough to be a challenge. First, open the top cover from the steering clutch and loosen the brake retaining bolt so the brake band is slack and free of the drum. * Remove the floor plate (4x 9/16" bolts) under the steering levers to provide access to the interior front bottom belly pan to final drive bolt & big washer. It is easiest to reach from the inside & above. Pull that bolt (3/4"). Pull the rear belly pan to final drive bolt (regular washer) too, it is easy to reach from the bottom rear. * There are two steering clutch housing to final drive bolts (15/16"), inside just above and between the two belly pan bolts. Break them loose with a socket and drive, then run them out with a pneumatic impact drive. * The four 1 1/8" rocker arm to final drive bolts are seriously torqued, and will take some effort, unless you have an awsome impact drive. The upper two bolts are special, they have a machined barrel surface with some thinner sections to the bolt and are hard to confuse with other bolts. Be sure to restore them to the correct location during reassembly. The inner bolts can only be reached from under the dozer. Use a 1 1/8" socket on a 3/4" drive, the upper bolt requires a 6" extension, the lower bolt does not. With the drive and socket in place, and the drive ready to turn the bolt, place a small hydraulic jack under the end of the drive handle/lever and use the jack to lift the lever to break loose the bolt. This works for both inside bolts (reassembly will need something similar: use a lever against the belly pan to turn the torque wrench down). The outer bolts can be reached with a 1 1/8" box wrench (lower) and socket (upper) drive, use cheaters to gain the needed leverage. * Place a hefty jack under the rocker cross beam, just in front of where the final drive is bolted (the bolts just removed, above). It is not needed, but is reassuring to look at. If placed just right during reassembly, the jack will help align the final drive to the rocker shaft. * The only remaining (6) bolts are on the outside top of the final drive. The third set from the top are 1/2" bolts, and longer. The other 4 are 15/16" bolts and much shorter. * Pull the 1/2" bolts. Locate two 16"+ long 1/2" all thread rods, and screw them in. Place nuts on the ends. The rods need to be at least 2" longer than the free space from the front of the final drive to the undercarriage rail, as the final drive will travel on these rods to clear the steering clutch. Support the front of the rods by lashing a rope, chain, etc, to each of them just behind the nuts, and use a hand winch to pull up on the rope/chain slightly. Apply enough lift to keep the rods from deflecting down, as they are keeping the final drive's drive shaft from bending the throwout bearing guide tube. * Pull the top 4 7/8" bolts. There should be no other bolts holding the final drive in place. Inspect the drive to be sure that you have removed all the retaining bolts. * Use a cheater or lever to nudge the final drive free and start it traveling on the 1/2" threaded rods. Use a long screwdriver or the like and push back the brake band as it tries to follow the final drive forward. Make sure the drive shaft is coming out gracefully and not bearing on the throwout bearing carrier tube nor getting jammed up with the brake band. Adjust the tension on the hand winch supporting the 1/2" threaded rods as needed. Nudge the final drive forward, and push back the brake band until the drive has traveled the full length of the rods and the outside of the final drive is blocked from further travel by the undercarriage rail. * The final drive now needs to be rotated on the axis of the drive shaft WITHOUT BEARING ON THE CARRIER TUBE. The rotation lifts the bottom of the final drive to the back and up, to where it clears the undercarriage rail and can be removed from the dozer. * Use webbing or rope. Fit one end through the conveniently located 1/2" hole in the bottom front middle of the hydraulic tank box (pull the two 9/16" bolts holding the cover to see the 1/2" hole). Secure that end of the webbing/rope by knotting it-it will need to hold about 100 lbs or more, so use a good material and check that the 1/2" hole won't cut the webbing/rope. Sling the webbing/rope between the final drive and the steering clutch housings, under the brake drum, to hold up/support the drum. You can use a trick to tighten the rope: open the lid on the hydraulic tank so that it is upright. Tie the unattached end of the sling to the lid's handle with slight tension, and then lower the lid-it should draw up the sling. Adjust until the sling is lifting the final drive by the brake drum, but only enough to hold it up, not so much that it binds the drive shaft or bends the throwout bearing carrier. You may want to load the sling enough that it lifts when the lid is partially closed, to give yourself a little extra lift later in the game if needed by lowering the lid more. * Once the brake drum sling is holding up the final drive, remove the 1/2" all thread rods, their webbing/rope and supporting winch. There should be nothing retaining the final drive now, just the brake drum supporting sling. * Use wooden blocks layed on the track and floor to support the front of the final drive, and place a floor jack off center to the front of the base of the final drive-jacking that should spin the final drive on the slung brake drum. You may also want to place a bolt into one of the rear side holes and use a hand winch to help lift/spin the drive. Gently use the jack, blocks, and winches to rotate the final drive about the drive shaft axis, iterate until the final drive clears the undercarriage rail and the drive shaft clears the throwout bearing tube. You may be able to pull the drive shaft out by hand and or pull the clutch pressure plate to release it-you can leave it in place too, and dismantle the clutch later. In either case, the final drive is ready to hoist. * Attach a chain to the final drive at the rearmost 1/2" hole (two holes down from the top rear). Use a chain hoist/lift/backhoe/3+strong men/whatever and carefully hoist the final drive from the dozer. Take care to free all the slings and winches as the load comes off them onto the hoist, the final drive will want to fall or spin. * Reassembly is the reverse of the above. Clean everything, clean it again... Do not make this a waste of time and money, Do Not Contaminate the clutch and brake during re-installation. Use a fresh clean sling for the brake drum (or lay clean cloth on the old one) to NOT CONTAMINATE THE BRAKE DRUM during reassembly. Once the brake and clutch are re-adjusted, use a new gasket and permatex the lid down to where NO OIL OR WATER can enter the steering clutch. Never open the cover without a FULL CLEANING FIRST, always reseal the lid with permatex.
How to collect unpaid county garbage bills in rural Kentucky Posted: April 22, 2014
Kentucky statute KRS 109.310 allows a county government to include delinquent solid waste fees to a client's property tax bills. Countys can place liens and auction land belonging to those unwilling to pay their garbage bill. This method has proven to be a very effective means to collect late solid waste debt for counties. As much as 95% of a county's outstanding solid waste receivables have been recovered from deadbeat property owners. Since about 90% of the public pays their garbage bill, making the remaining reluctant 10% also pay their bill is generally popular.
This Zip file contains all the software and source code with sample data to manage a county solid waste billing office. Use "USER1" with password "12345" to login to the system. The software is written in Foxpro, a deprecated database system (still available on ebay, 2014). Any version from V5 to V9 will compile and run the system. Run ready executables are included in the zip file. This software is "as is" under the MIT license and comes with no warrenty, but it is free and open source. See the source file act_.prg. All the data shown here is public record, and was FOIA'd by John Cleveland in 2006.
An example property tax bill that includes long (>90 days) overdue garbage debt:
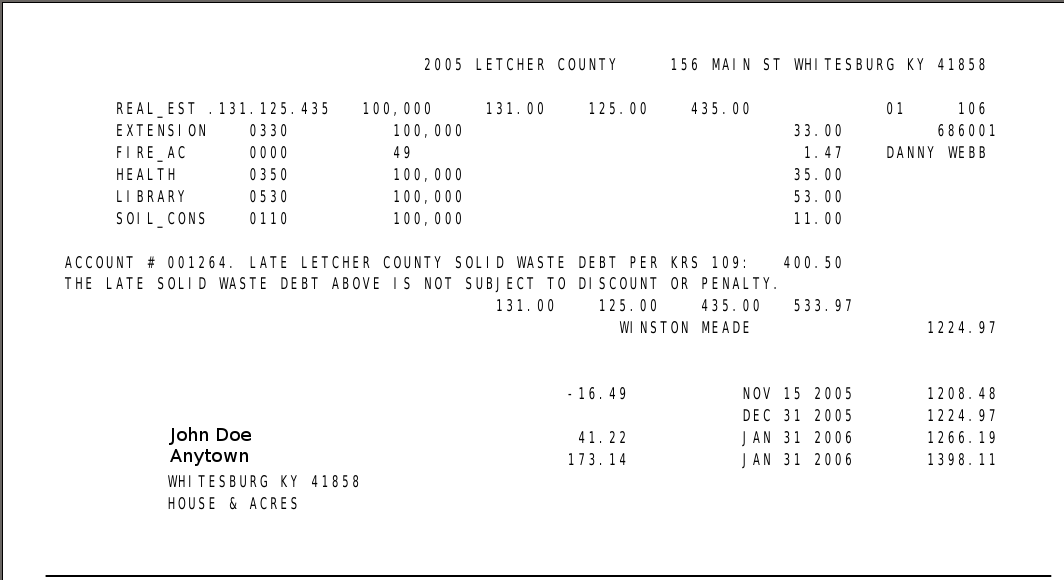
Some documentation on operating the accounting program is here, on reports available from the accounting program is here, on running residential bills, here,on running Commercial bills is here, on importing PVA ARM tax bill data (the newer of two common PVA data sources) into the accounting program is here, on importing PVA TRIM data (the older of two common PVA data sources) into the accounting program is here, and documentation on how to link the solid waste debt to a property tax bill is here. This documentation is incomplete, and does not cover most things. For starts, it does not cover bill printing, nor all the sources of data needed to place delinquent debt onto a property tax bill, and it does not cover any of the auditing or security methods. Some parts of this software are still (2014) in service. Contact ap@appal.org with questions.
Nice Sights Posted: April 18, 2014
Big Ears

Ferns Boulder

Moss Light

Sunlit Flower

Canopy

Forest Fruit

Moss and PuffBalls

Morels

Eft

Red Fall

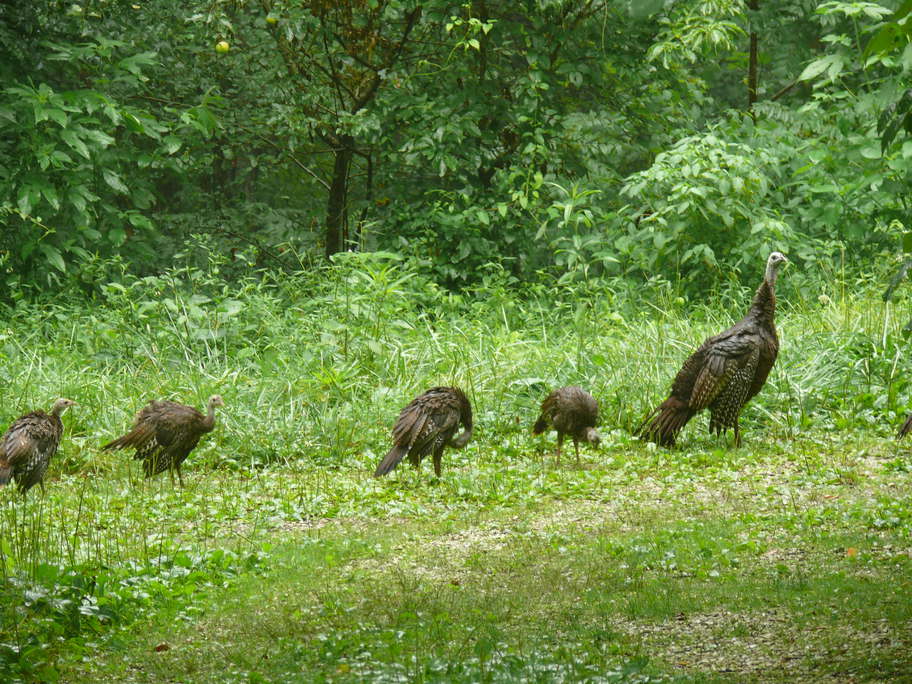
Young Turks
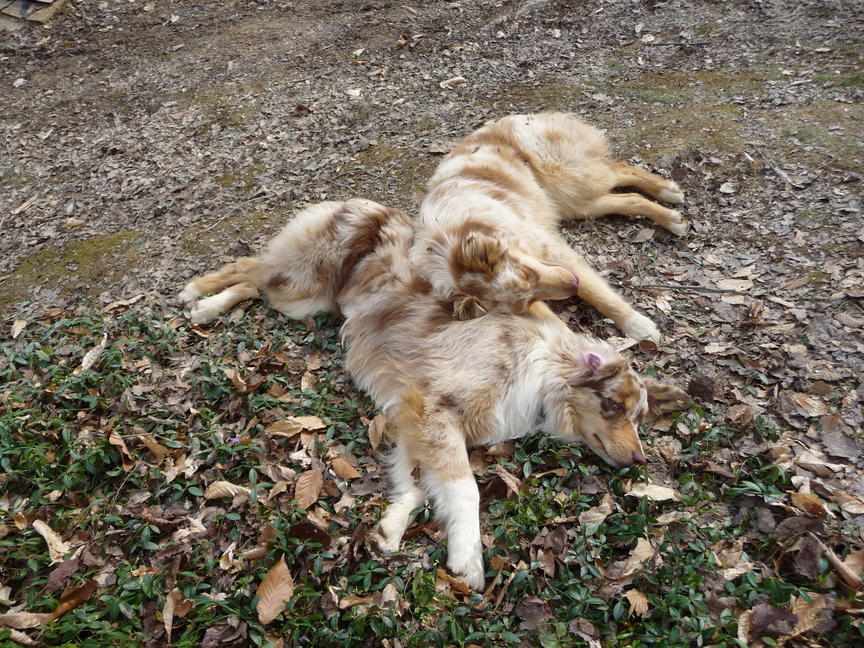
Young Pups
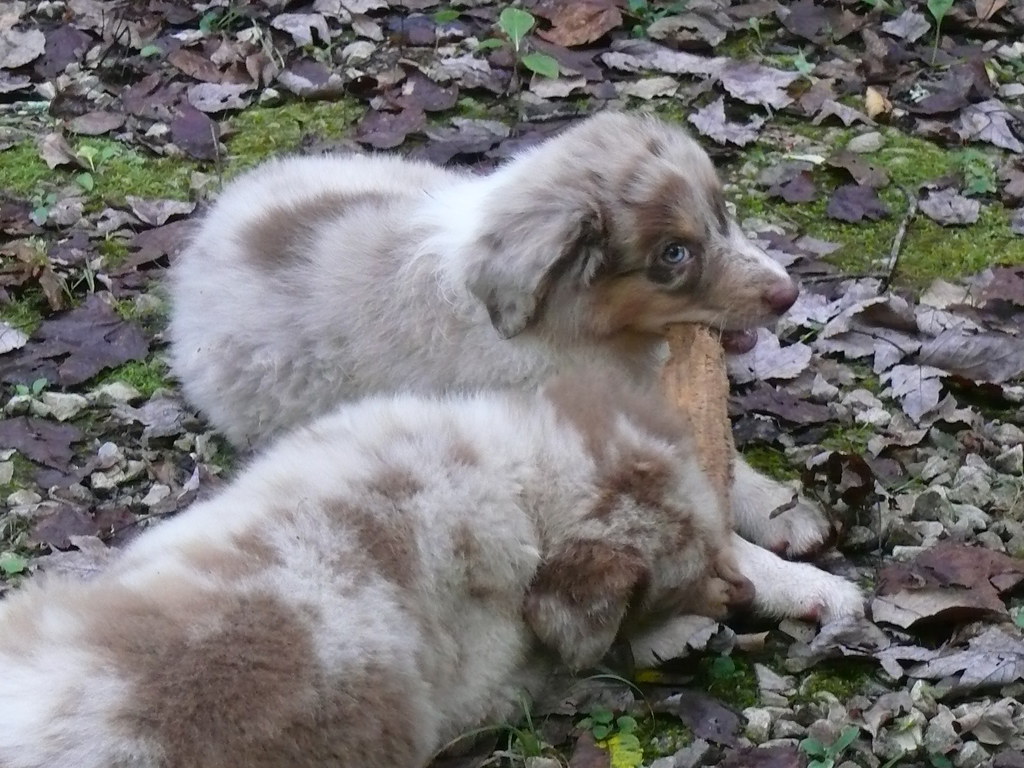
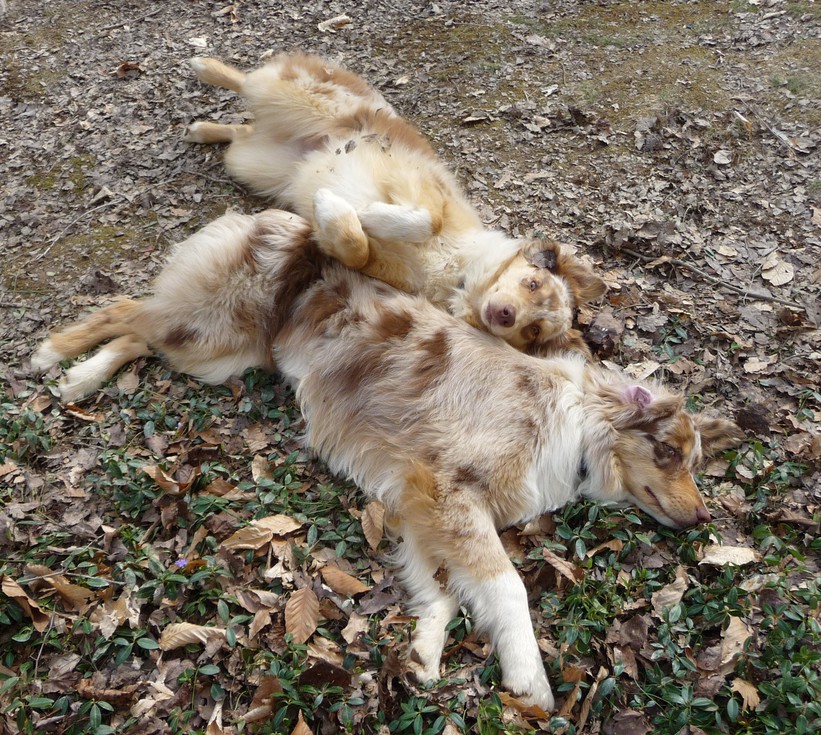
Getting Bigger
Leaf Ear
Ice Quants

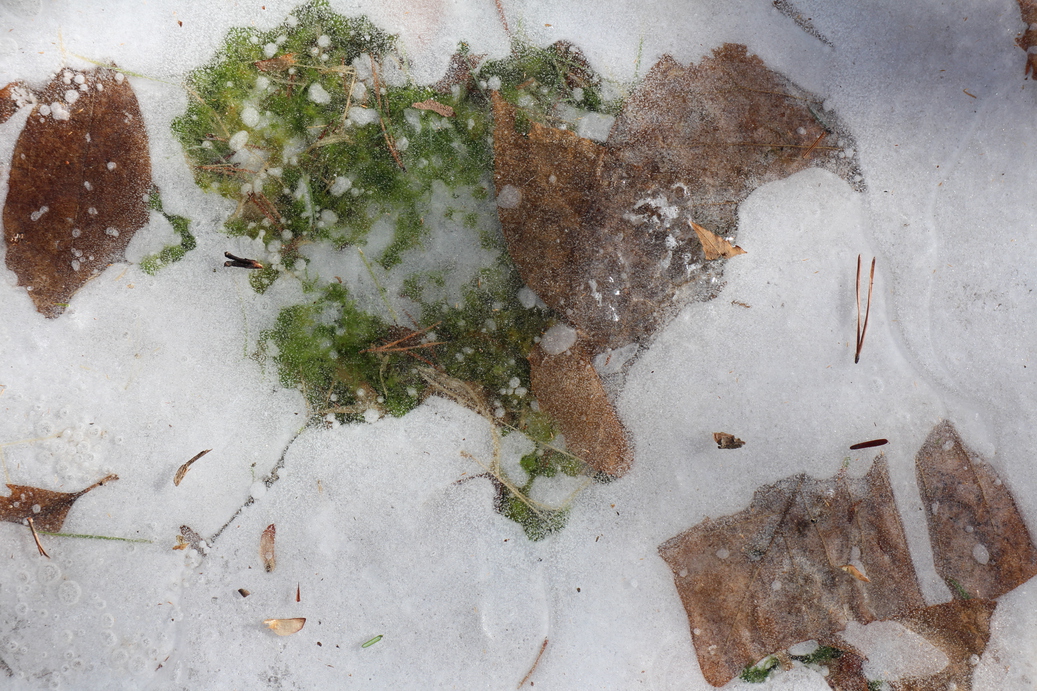
Ice Moss
Ice Floes

|
Mostly Rocks Posted: April 17, 2014
A Flying Rock

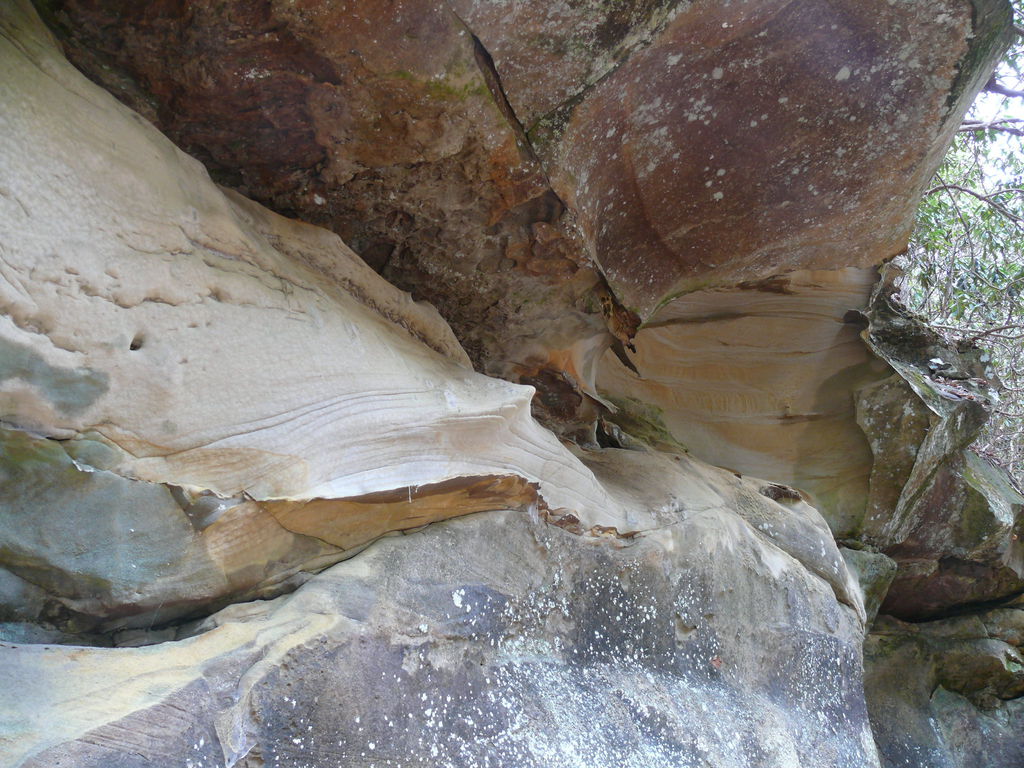
Carved By the Wind
Downstream

Falls to the North Fork

A Hole with Rocksicles

Mossed Rock

Rock Face

Rock Roots

Ice Troll

Snowhenge

|
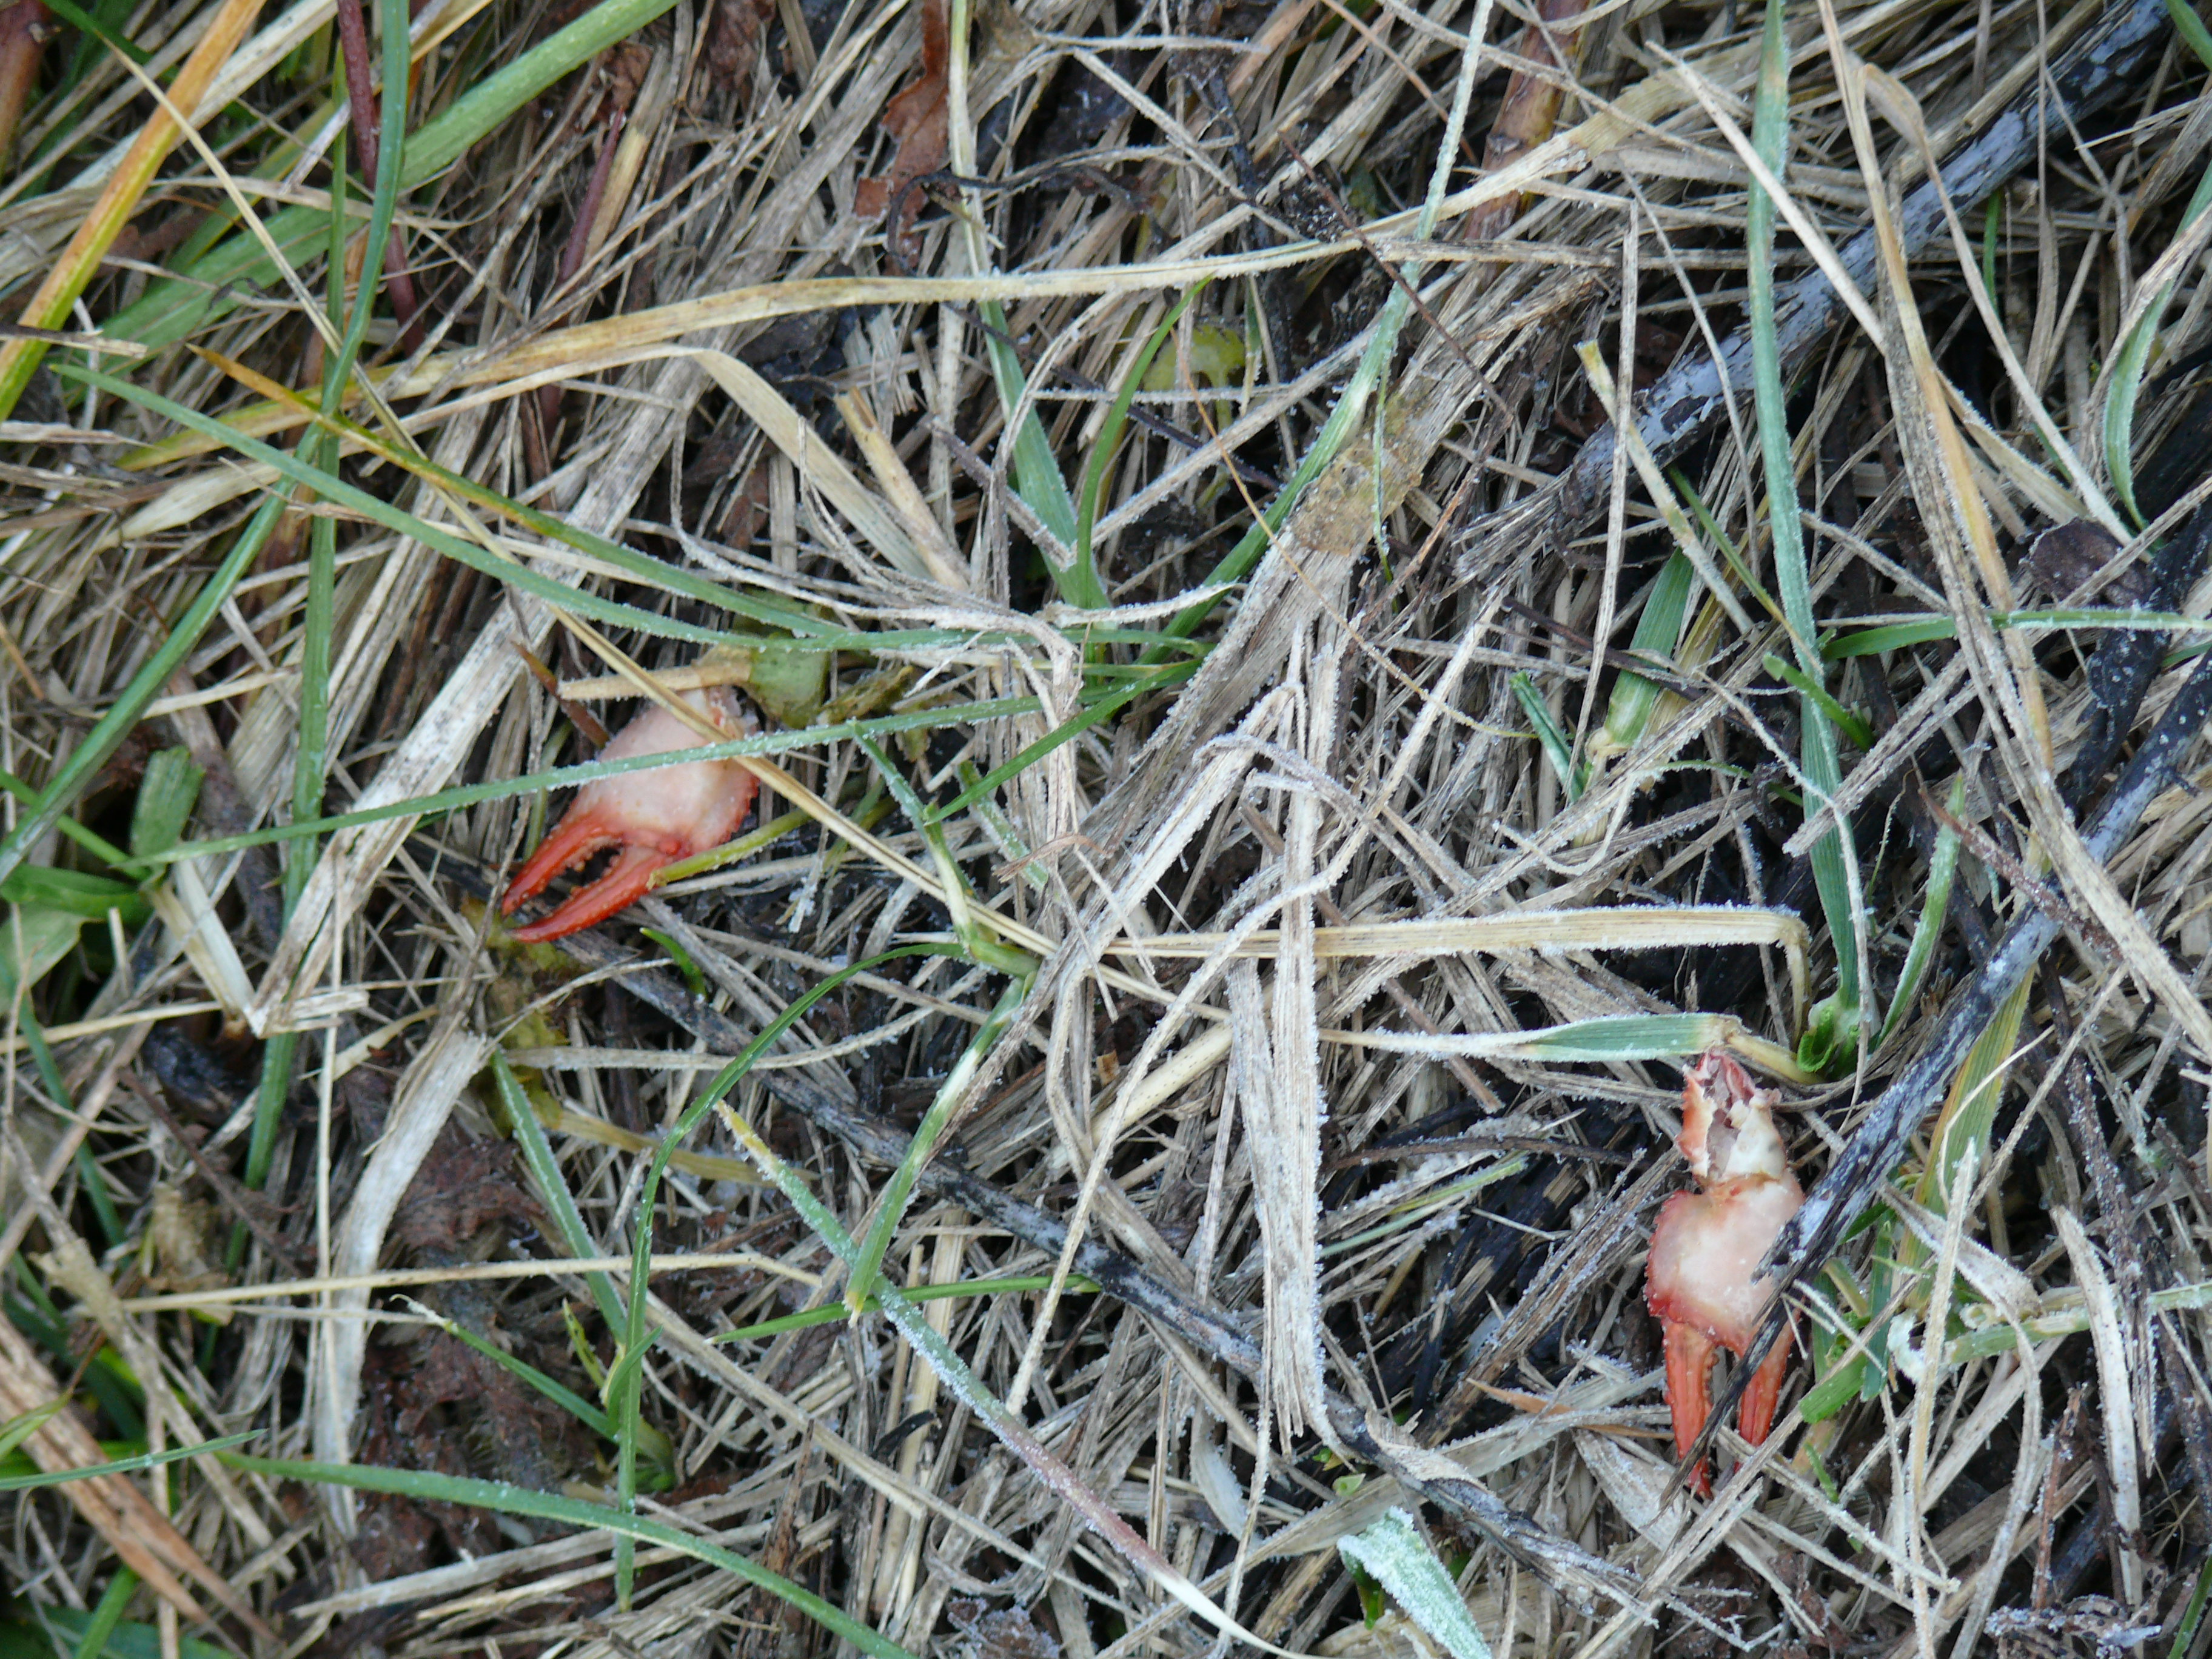
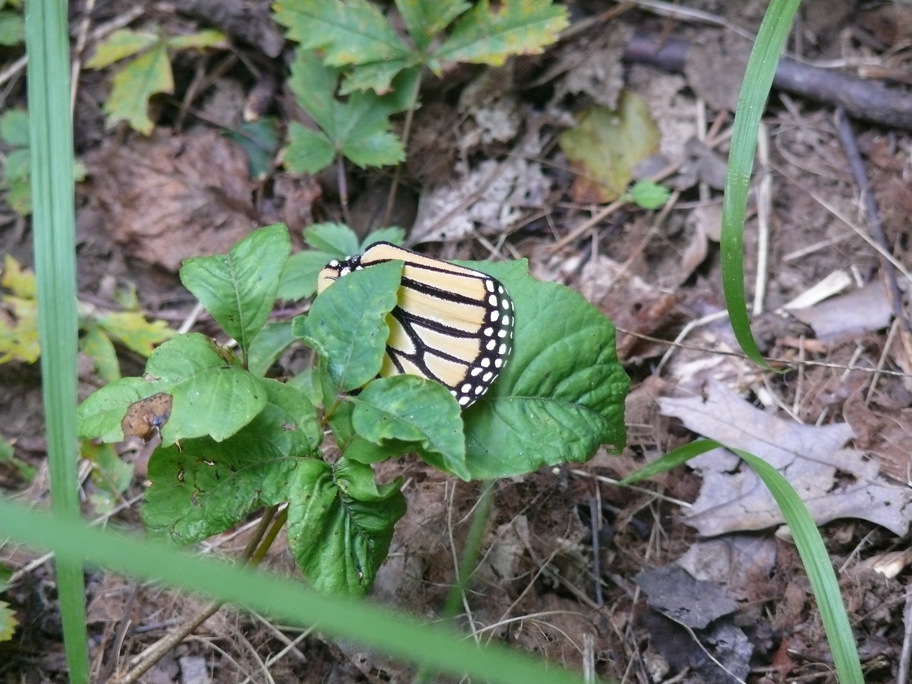
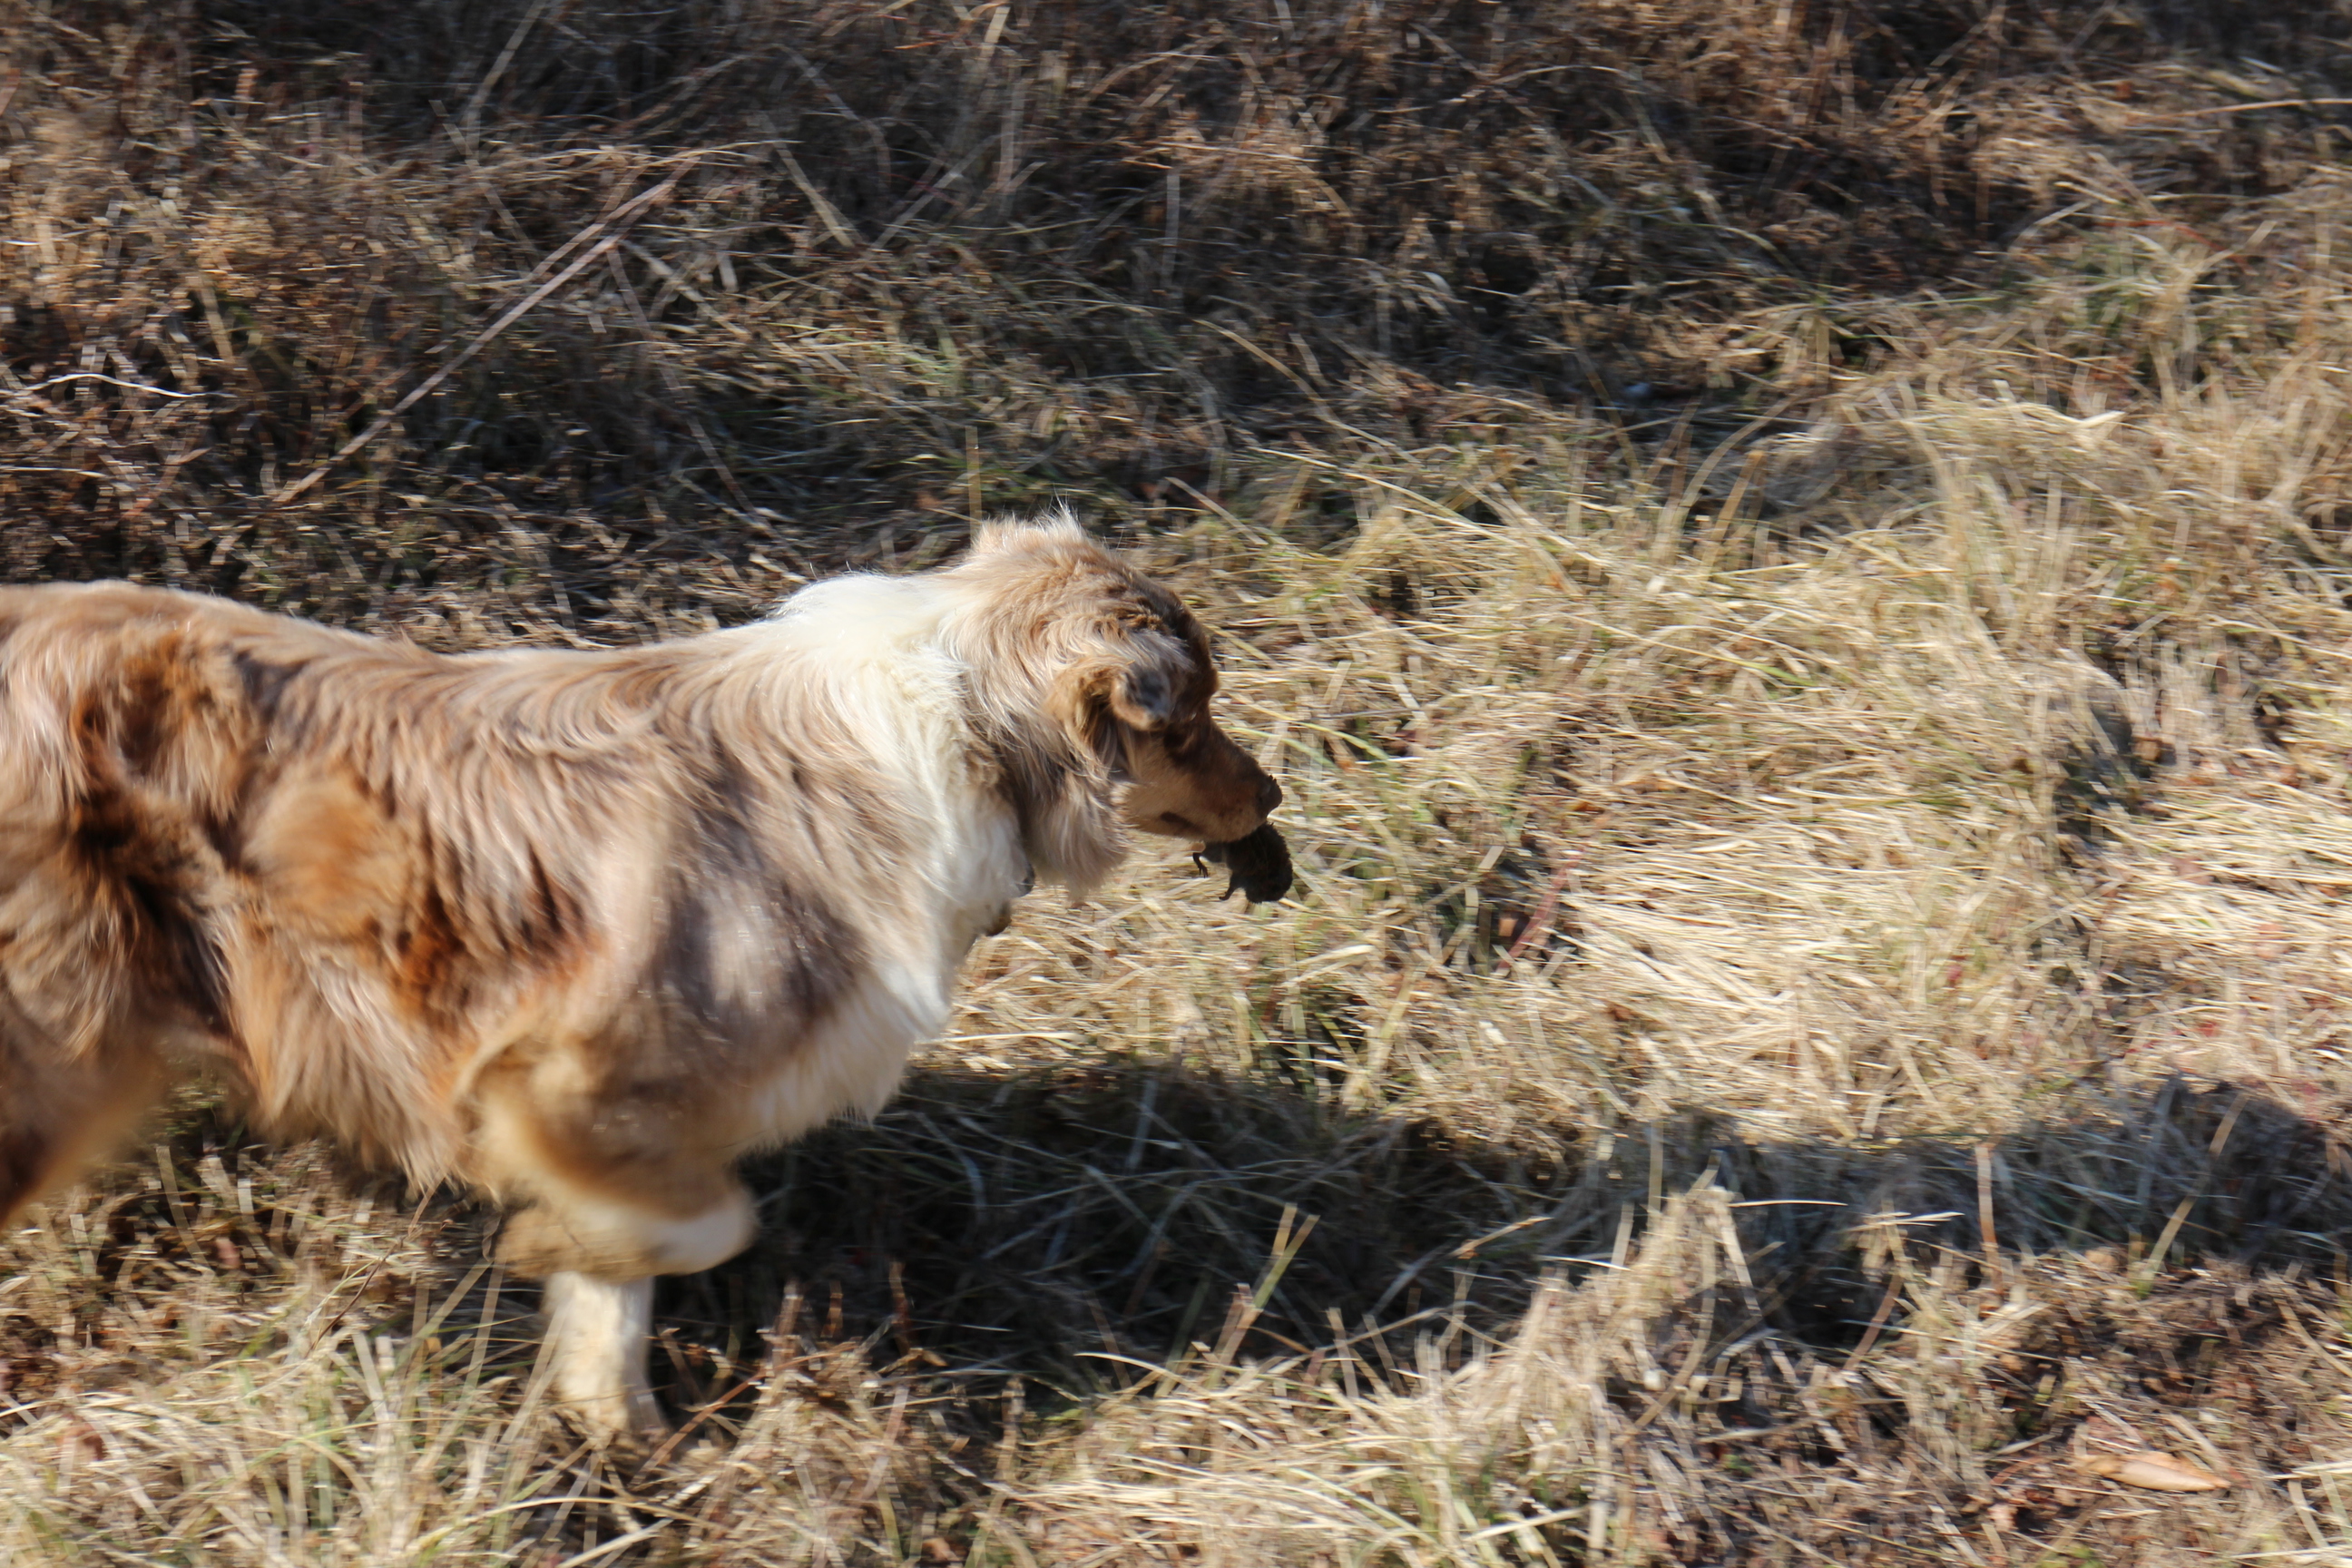
Life Cycles Posted: April 17, 2014
Cold Claws
Butterfly Parts
Predator and Prey
Emergence

Granpa Butterfly

Thoughtless

Herbert's Barn

Another Old Butterfly

Reclaimed

Red Eyed Terrapin

Red Mushroom

Seventeen

|
How To Setup Secure VNC with Shorewall and SSHD Posted: April 10, 2014
How to set up a Secure VNC session using sshd and Shorewall

Many methods for securing VNC on Windows machines use Putty
(https://www.chiark.greenend.org.uk/~sgtatham/putty/) to manage the
VPN as a SSH session with port forwarding.   The method shown here
simplifies the Windows 7 setup and does not use Putty on the workstation.
Instead, a ssh port on the firewall is forwarded to an internal Linux SSHD server,
and that server manages the secure tunnel.  The Linux server
redirects the forwarded VNC ports using Shorewall and DNAT.
VNC clients need an SSH login on the Linux SSHD box.  When they
make the SSH connection to the SSH server, a local port is served on their machine to
access the VNC hosted session on the Windows 7 machine.

*NB:  This method does not add security to the local lan.  Other workstations
on the local net inside the firewall might run a packet sniffer to view
the VNC session data.  The sessions within the lan are only secured by the
VNC session password.  The security here is for external viewers to gain
the local hosts.  Viewers outside the lan use the ssh encrypted VPN tunnel, and
are quite secure.  Use Putty on the individual Windows workstations, the more
common method, to secure the sessions within the lan.  The method described here
is more appropriate for small lans with users that don't manage Putty well.  It is
simpler for the user to set up and run than having to also sort out Putty.

* In this example, two Windows 7 (tm) workstations are assigned the IP
addresses 192.168.1.12 and 192.168.1.13 with a Linux SSHD server that
resides on their network with its inbound SSH port forwarded from the
internet gateway to manage the SSH VPN tunnel.


***  W O R K S T A T I O N    S E T U P   ***
* Install VNC server on the workstations.

  * Go here https://www.tightvnc.com/download.php and download tightVNC
    for your operating system.
  * Navigate to your browser's download directory so you can see the
    files listed there.
  * Click 2x on the TightVNC installation routine you just downloaded,
    e.g.: tightvnc-2.7.10-setup-64bit.msi
  * OK the next two dialog windows that ask about trusting and running
    the tightvnc installer
  * Accept the terms of agreement, Click "I accept", then click "Next"
  * Click "next" again, Click "Install" to start the install
  * In a moment, the User Account Control dialog will come up and ask
    if you want to allow the installer to run, click "Yes".
  * Once the installer is done, click "Finish"

*  Next is the VNC server configuration

  *If you have a "VNC" icon in the lower right corner of the desktop,
  click on it,  If you do not, click the start button and click the
  "Start VNC Server" button that should be at the bottom of the list
  of programs, that will put the "VNC" icon in the lower right.
  Windows may hide that icon, and you may need to find and click on
  the little black arrow near the bottom right of the desktop that
  unhides it to see it.  Now please click on the VNC icon to open
  the configuration dialog.

  * You should have a dialog window titled "Tight VNC Server Configuration",
  in that window, for workstation 192.168.1.12, change the "Incoming
  viewer connections" from 5900 to 5902.  For workstation 192.168.1.13,
  change the "Incoming viewer connections" from 5900 to 5903.
  Next click on the "Set" button for the Server password (just below
  the 5902/3 entry), and set the password to "22222" (use your own
  passwords, but do not lose them), Click on the "Set" button just
  below, to set the Viewer password, and set that password to
  "22222" as well.  In this example, the 192.168.1.13 station
  uses the password "33333", in real life use your own unique
  high quality passwords.

* Click OK to close the configuration window. You are done setting
  up the Windows machine.


***   L I N U X    S S H D    S E T U P   ***
* Install Shorewall (https://shorewall.net/)

* Configure the /etc/shorewall files as:
  * Interfaces file: "lan     eth0            -               tcpflags,routeback"
  * Rules file:
	"DNAT    $FW     lan:192.168.1.12:5902   tcp     5902"
	"DNAT    $FW     lan:192.168.1.13:5903   tcp     5903"
  * Zones Files:
	 "fw      firewall"
	 "lan     ipv4"
  * Policy File:
	 "lan     $FW     ACCEPT          -"
	 "$FW     lan     ACCEPT          -"
	 "all     all     REJECT          info"
* Invoke "shorewall compile" and see if Shorewall compiles without error.
* Invoke "shorewall start; sleep 60; shorewall clear" to test your settings
  for a minute without being locked out of the system if you have made a mistake.
* Once shorewall is working, invoke it one more time with "shorewall start"
* If you are running Debian Linux, you may need to also edit
  /etc/default/shorewall and set "Startup = 1".
* Configure the /etc/shorewall files to start Shorewall
    /etc/shorewall/shorewall.conf startup_enabled=yes.

*  You need to edit the firewall/gateway to setup a port forward.  If you use
  the default ssh port, 22, forat machinesward that to the SSHD machine.  If you choose
  a different port for ssh, set that port to forward to the SSHD box and edit
  the SSHD box's configuration in the /etc/sshd.conf file to set the listening port to
  your chosen inbound ssh port, for example, 20200.  The -p parameter in the ssh calls
  shown below will need that revised port setting.  Leave the -p off for the
  default port 22.

***    R E M O T E   C L I E N T    ***

A word about viewers:  you can use Windows or Linux to view the desktops. The example
below shows how to use Linux.  Windows users would need Putty to set up the
ssh tunneling.  Putty uses the same ports and values as the ssh tool described here.
There are many VNC viewers.  TightVNC provides one in the same package already
installed on the host machines, install it without setting up the VNC server to
use a Windows Viewer.  Linux offers several VNC viewers as well, a common one
being KRDC, the K desktop Remote Desktop Connection tool.

* With machines up running Win7 and VNC icon in lower left, a remote inbound
ssh session can securely host/view their desktops from Linux by:

  ssh -p 20200  -L 5902:192.168.1.12:5902 userid@123.123.123.123  # where -p 20200
	 is the non-standard ssh port assigned  in the /etc/sshd.conf file.  Leave the -p
	 off if you are using port 22, the default port.  192.168.1.12 is the
	 IP of the Windows 7 workstation, and the 5902  is the port assigned in the
	 Shorewall configuration, and corresponds to VNC display 2.  See the VNC
	 documentation for more about display numbers and ports.  The userid
	 is your login ID on the SSHD box, 123.123.123.123 is the IP address of the
	 site (the IP assigned to your gateway firewall by your ISP).

	 You can suffix a "-N" to the ssh line above to not open a shell on the SSHD machine.
	 Use Ctrl-C to quit the SSH session in that case, otherwise just exit the shell
	 as usual to quit.

* Launch a vncviewer as localhost with display :2 and password 22222 to see the
  192.168.1.12 machine.

* Use the 5903, 192.168.1.13, password 33333 values as above to view the Windows 7
  machine at 192.168.1.13 and launch a vncviewer as localhost :3 password 33333


***  F I N I S H E D   ***


* To close it all down, quit the viewer, exit the ssh session and have the Windows
  users disable the VNC service on their desktop.  If you don't close the ssh session
  the 5902 (etc) ports are not freed up and will be trouble if you launch a second
  instance of ssh with the same ports.
| |